Part of Salford Community Leisure
Have you ever wondered how to make a simple clay pot? Here, artist Caroline Coates shows you the step-by-step process. You could do it in your own time, or support your learners to complete their own in the classroom. Let us know how you get on!
What you'll need
- Air Drying Clay – whatever colour you like.
- Mark making tools – clay tools, cake decorating tools or a household knife is fine.
- Tap water.
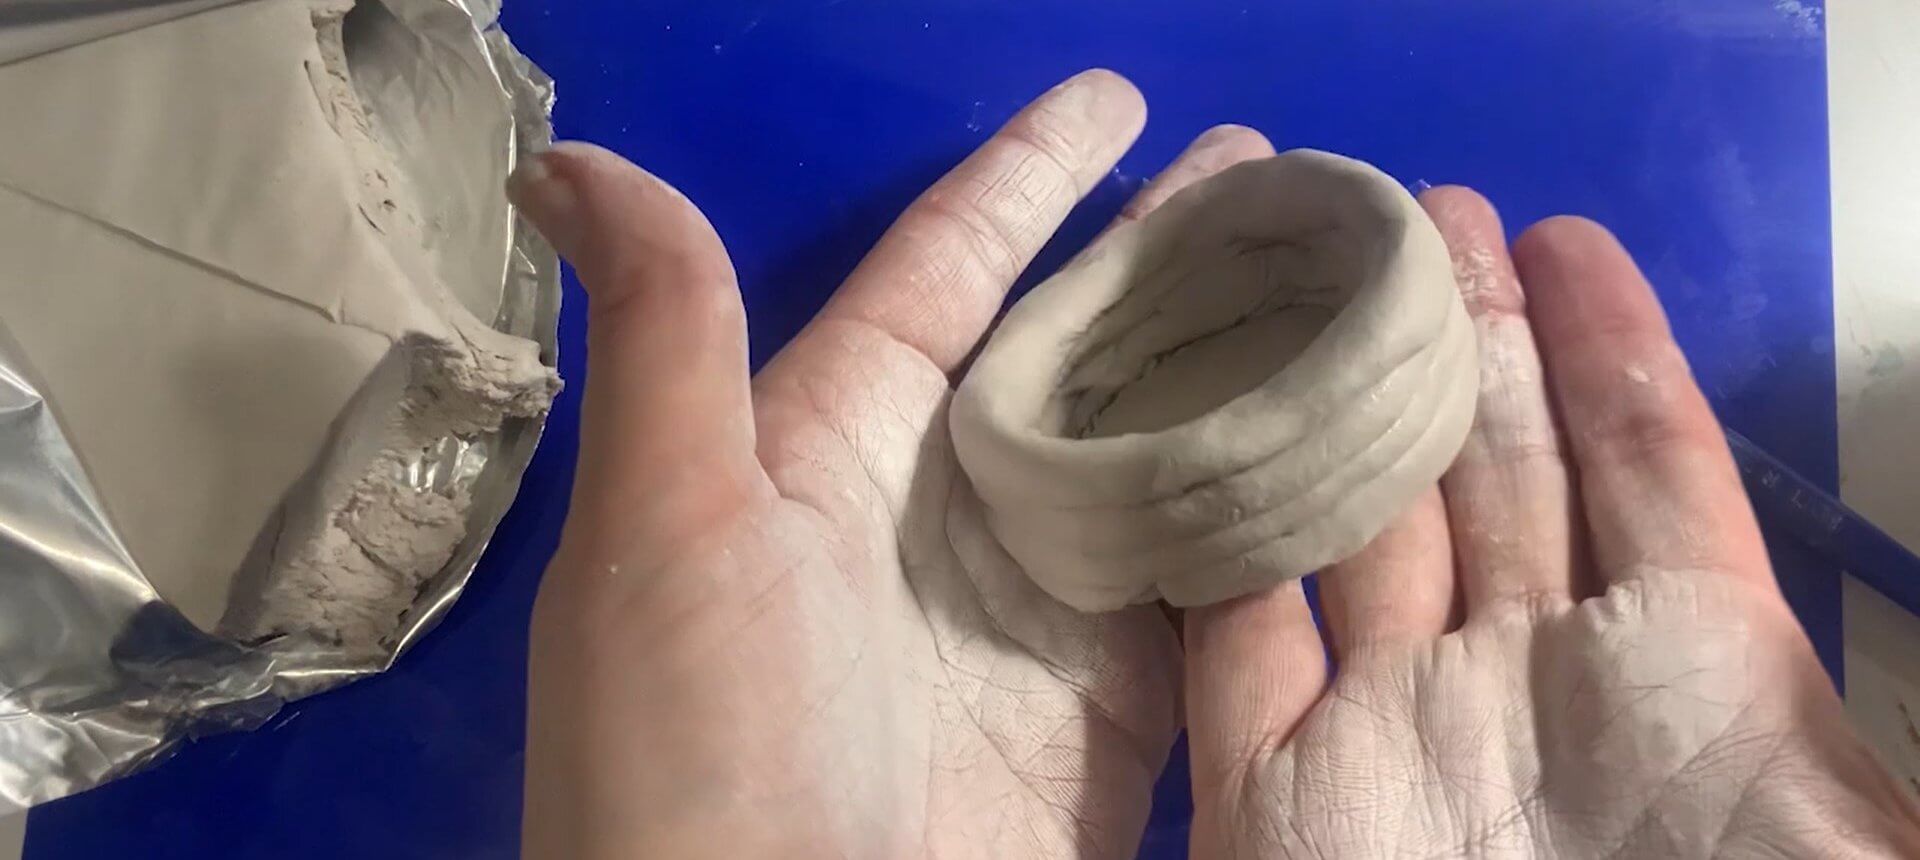
Instructions - coil pots
- Take a small piece of clay and make a ball.
- To make the base of your pot flatten your ball to make a disc. You can use a rolling pin and a cutter for this if you like, or do it with your hands.
- Next make your coils. To do this roll a thin sausage shape read to build up in rings.
- Score the base and coil with one of your tools and add a small amount of water.
- Add your coil in a single layer all the way round.
- Repeat until your pot is the height you’d like.
- Leave to dry and paint if you like – paint mixed with PVA glue will help to seal any cracks.
Instructions - pinch pots
- Take a piece of clay around the size of a small satsuma and make a ball. Make the clay quite wet before you start so it’s easy to shape and won’t dry out while you work.
- Take some time to smooth the ball very thoroughly using water to smooth out any cracks or rough areas.
- Next, start to pinch.
- Use your thumb in the middle and fingers on the outside to pinch and squeeze your pot in to shape.
- Once you’re happy, smooth the outside and leave to dry.
- Once dry the pot can be painted if you like. Paint mixed with PVA glue will help to seal any cracks.
Keep In Touch
Sign up to our mailing list and be the first to find out about our latest news, offers and forthcoming CPD events. Stay in the know, on the go!